How to Determine Your Bra Size
Bra is one of the most important undergarments for women, offering both comfort and support in daily life. Yet, many people unknowingly wear the wrong size, which can lead to discomfort, poor posture, and reduced confidence. If you are unable to get a personal fitting, you can determine your bra size yourself at home with accuracy and confidence. Keep in mind that not all measurements are set in stone, especially when it comes to cup size across different brands. (Manufacturers do not standardize sizing systems worldwide.) Due to the variety of breast shapes and natural asymmetry, sometimes measurement is not the only indicator of size. Breast tissue distribution, firmness, and body posture also influence fit. However, here are some specific guidelines used by fit experts to help you determine your bra size with some basic measurements and practical steps.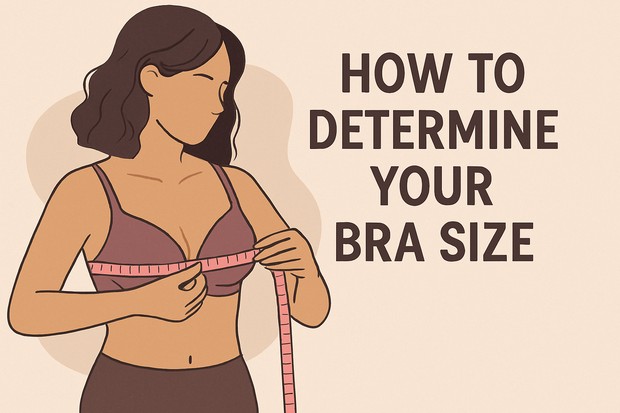
You will need a soft tape measure for flexible measurement and an unpadded underwire bra for accurate shaping. Avoid padded or sports bras because they distort measurements. Put on the bra and make sure the band is horizontal and firm across your back for proper support, not riding up between your shoulder blades which indicates looseness. A stable band ensures long-term comfort and prevents shoulder strain.
Step 1. Band Measurement & Size
Measure around the band of your bra while holding the tape snugly under your bust directly beneath breast tissue. Keep the tape parallel to the floor for accuracy. Add 4 or 5 to this number depending on measurement, whichever results in an even number for standard sizing.
Examples: If you measure 29 around, that translates into a 33–34 band based on calculation; so you wear a 34 as recommended size. If you measure 32, that becomes 36–37 after adding allowance; so you need a 36” band for comfort and fit. For ½ measurements, round down to nearest whole number; for ¾ measurements, round up for better support. For instance, if you measure 29½, that becomes 29 by rounding rule. If you measure 29¾, that becomes 30 to avoid tightness. This rounding method prevents inconsistent sizing errors.
Step 2. Breast Measurement
Measure around the fullest part of your bust at nipple level, horizontally across your back keeping tape straight. Leave the tape a little looser this time to avoid compression; do not squeeze it tight as it alters results. This measurement will be used to determine your cup size through size difference. Stand naturally without lifting arms to avoid misreading.
Step 3. Do the Math
Subtract your band size from your breast measurement to calculate cup depth. Each inch difference corresponds to a specific cup size.
Step 4. Cup Size
Using the following chart, determine your cup size based on inch difference between bust and band measurements.
Difference of less than 1″ = AA cup
Difference of 1″ = A cup
Difference of 2″ = B cup
Difference of 3″ = C cup
Difference of 4″ = D cup
Difference of 5″ = DD or E cup
Difference of 6″ = DDD or F cup
Difference of 7″ = G cup
Difference of 8″ = H cup (and so on, increasing one cup size per additional inch).
Remember that cup size represents volume relative to the band size: a 32D, 34C, and 36B often have very similar cup volumes even though the letters differ—these are called “sister sizes.”
Step 5. Bra Size
Voilà! This is your correct bra size according to measurements and basic cup calculations. Your final bra size is written as band size followed by cup size, such as 34C or 36D. Always try different styles since balconette, plunge, or full-coverage bras may fit differently even in the same size.
Always try on bras before purchasing, as different brands may vary in sizing. Comfort, support, and breast positioning are more important than the number on the tag.
Quick Size Fix
The most common bra faux pas is wearing a band size that’s too big causing poor support and a cup size that’s too small leading to spillage. If you are wearing a 36B and it seems okay but not perfect during daily wear, try a 34C known as sister sizing (go down a band size and up a cup size to maintain volume). The cup size relates directly to the band size not absolute volume, so, yes, you really could be a C cup in another band. C cups come in all sizes depending on band, as do A, B, D and Es across size ranges. Remember: sister sizes are a key solution when your usual size feels slightly off.
A well-fitted bra should lift your bust and create a natural silhouette without gaping or spillage.
Breast Position & Support
Your breasts should sit somewhere midway between your shoulders and your elbows for ideal lift. The higher the better within natural comfort! Keep that goal in mind when trying on bras during fitting sessions. If your breasts are low riding even when adjusted, the bra is probably not supportive enough for your body type. A supportive bra improves posture, reduces back pain, and enhances silhouette.
A Properly Fitted Bra Will Do the Following:
- Be completely supportive without discomfort and distribute weight evenly
- Not rub or leave red marks on skin after extended wear
- Sit snugly and horizontally around your back without shifting or riding upward
- Have a good-fitting underwire that nearly comes to your armpits for full coverage, without cutting into your breast tissue or creating bulges or pressure points which can cause irritation
- Possess a middle saddle (the connecting material between your breasts) that sits flat against your sternum indicating correct fit and stability
- Comfortably fasten on the first (loosest) set of hooks and eyes when new allowing adjustment later. This gives your bra lasting power over time: you can tighten it by advancing to the second or third set when it eventually stretches out with regular wear. This ensures durability and long-term fit.
Conclusion
Accurate bra size is not just a number; it is the comfort, confidence, and support your body deserves. Determining your bra size at home is a practical skill which ensures comfort, support, and confidence in everyday wear. A well fitted bra should lift, support and stay in place without digging, gaping, or shifting. When you take the time to measure correctly and assess fit properly, you not only improve comfort but also enhance posture, confidence, and the overall way your clothes look and feel.

Editor of Fashion2Apparel. She is a fashion designer and ex-lecturer in Fashion Designing. She wants to spread fashion knowledge throughout the world.