Last Updated on March 14, 2022
Boning:
Boning is a narrow strip of plastic or metal sewn into seams or casings used to build structure and support into garments. It’s called boning because years ago bones were used in place of plastic or metal. It’s most commonly sold by the yard as hard plastic in a soft feltlike fabric casing or as thin flat plastic boning that you can sew through without a fabric casing. Metal boning is harder to find and may have to be ordered from specialty websites. Metal boning, also called spiral-steel boning, is more flexible, bends with the body and may be more comfortable to wear. In this article I will discuss about boning for dressmaking, types, uses and how to sew boning.
Types of Boning:
There are different types of boning. Boning are used to build a structure in dressmaking. In the earlier period boning are specially used in corset and bodice. But now boning are used in different kind of garments.
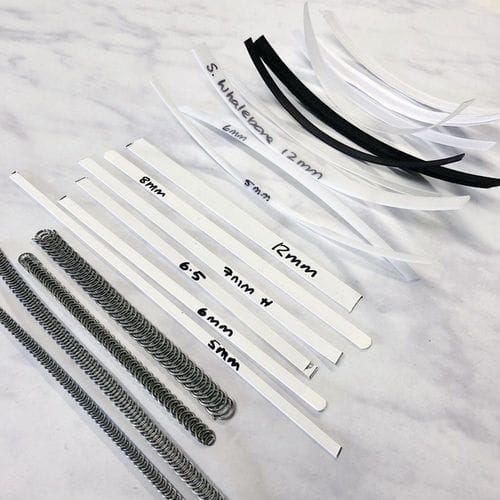
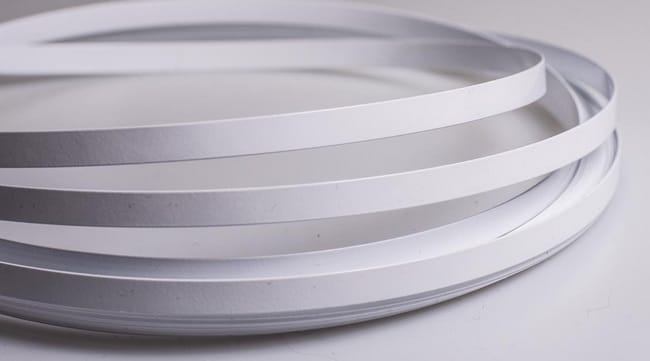
- White Steel Boning
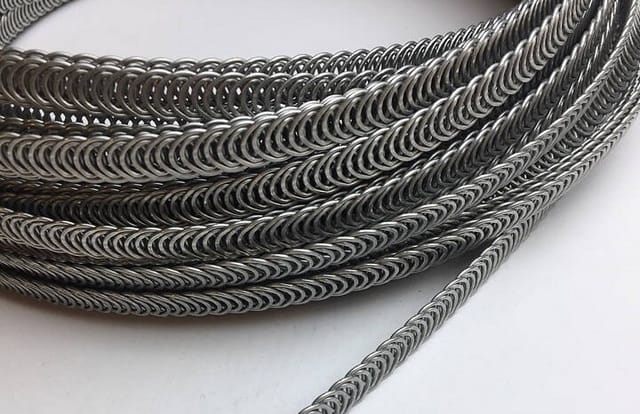
- Spiral Steel Boning
- Hoop Boning
- Plastic Boning
- Fusion Coated Boning
- Rigilene Boning
- Lacing Bones
- Extra Wide Bones
- Natural Corset Boning
- Whalebone (Baleen)
- Featherbone
- Horn
Above types of boning for dressmaking are described below:
1. White Steel Boning:
A rigid bone made of nylon coated spring steel. 1/2″ or 1/4″ (6mm.) wide. Coating prevents rusting and is highly resistant to washing detergents, and other fluids. Moderate flex in one direction only.
Advantages: A strong, rigid boning.
Disadvantages: Cannot be sewn in curved channels. Can buckle or twist within casing.
Specs: High carbon, hardened, spring steel flat wire. Ends are white plastic dipped.
1/2″ wide – .014″ thick
1/4″ (6mm.) – .010″ thick
Uses: Corset Boning. Costuming.
Cleaning tips: Dry Cleaning recommended
2. Spiral Steel Boning:
A sturdy, flexible bone made of galvanized spring steel wire. 1/2″ or 1/4″ (6mm.) wide. Available in pre-cut lengths or in continuous rolls. High flex in two axis.
Advantages: A strong, flexible boning. Can be sewn in curved channels.
Disadvantages: The flex in two directions may not be appropriate for all applications.
Tips: Not necessary for pre-cut lengths. 1/2″ or 1/4″ metal tips for continuous spiral steel.
Specs: Hardened, galvanized, spring steel round wire. Pre-cut lengths are tipped with nickel plated brass tips.
1/2″ wide – .035″ thick
1/4″ (6mm.) – .028″ thick
Uses: Corset boning, frequent or long-time wearings. It’s amazing stiffness when sewn into bone casing, coupled with its ability to flex in all axes, makes this boning ideal for areas that require mobility such as brassieres and curved corset seams.
Cleaning tips : Dry Cleaning recommended
3. Hoop Boning:
Two strips of steen encased by either white buckram or plastic. specs 1/2″ wide. Moderate flex in one direction only.
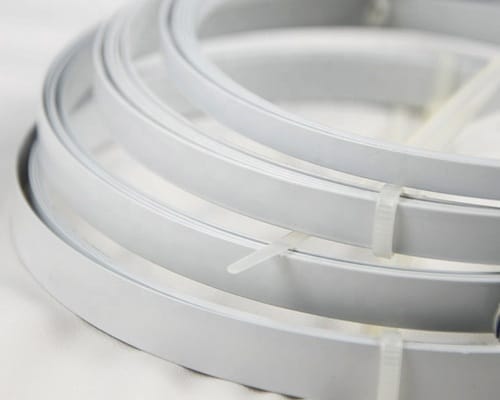
Advantages: Will keep its circular shape when sewn into skirts.
Disadvantages: Will hold it’s curve after long wearings if used in corsets.
Tips: 1/2 metal tips recommended.
Uses: Hoop Skirts. Costuming.
Cleaning tips: Dry Cleaning recommended
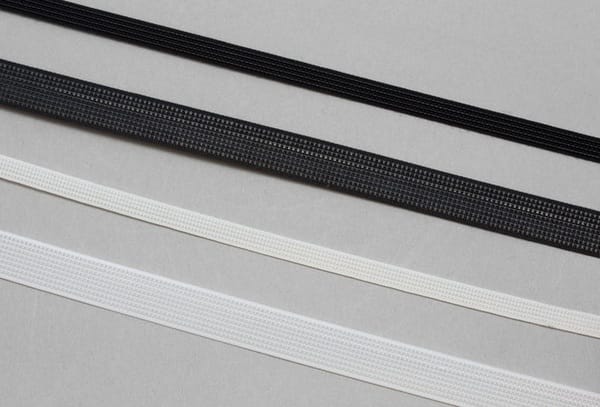
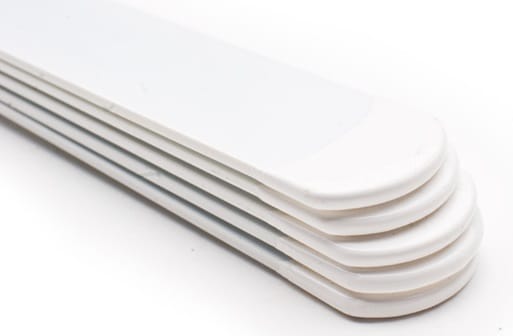
4. Plastic Boning:
Extruded plastic boning. Designed for flexible support and to prevent rolling of garment materials. Specs are 1/2″ wide – .045″ thick, 1/4″ (6mm.) – .080″ thick. High flex in one direction only.
Advantages: Plastic material is extremely durable and highly resistant to washing detergents and other fluids.
Disadvantages: Very flexible, not suitable for “waist-reducing” corset. Cannot be sewn in curved channels.
Uses: Garments that require very light support. Highly recommended for garments used in high voltage environments.
Cleaning tips : Machine or Hand washing.
5. Fusion Coated Boning:
Fusion coated carbon steel. Very rigid. Specs are 1/2″ wide – .050″ thick. Very little flex, one direction only.
Advantages: A strong, rigid boning.
Disadvantages: Cannot be sewn in curved channels.
Uses: Busk Reinforcement. Heavy support. Costuming.
Cleaning tips: Dry Cleaning recommended
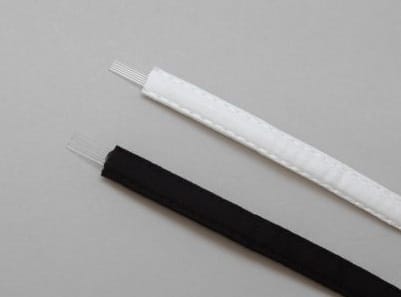
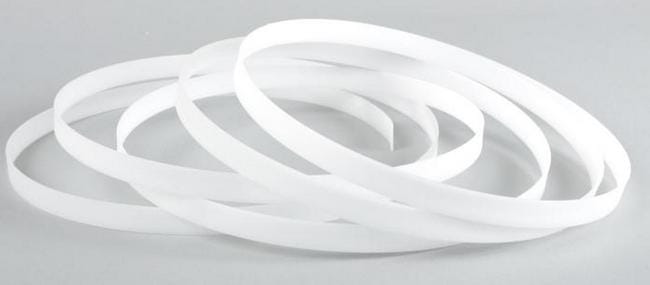
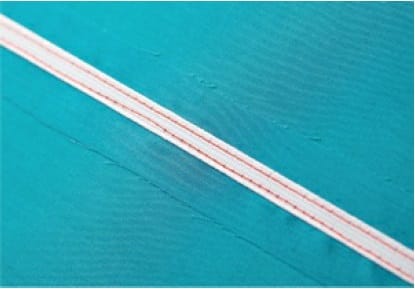
6. Rigilene Boning:
Polyester type boning, can be sewn through. Specs are 12mm or 8mm wide. High flex, one direction only.
Advantages: Soft edges for easy sewing by hand or machine. Flexible, durable, and will not crack.
Disadvantages: Very light support. .
Tips: 1/2″ or 1/4″ Rigilene Tips. Black or White available.
Uses: Specially created for giving shape and support to strapless garments, theatrical costumes, evening wear, beachwear, and soft toys.
Cleaning tips: Dry Clean or Hand Wash without loss of stiffness.
7. Lacing Bones:
Fusion coated carbon steel and very rigid. Specs 1/2″ wide – .050″ thick. Very little flex, one direction only.
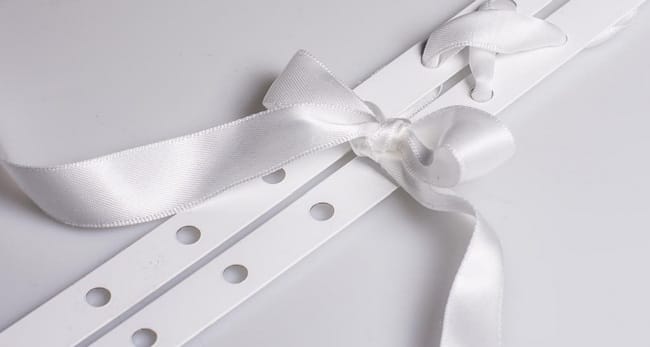
Advantages: Very strong, rigid boning.
Disadvantages: Cannot be sewn in curved channels.
Uses: Back lacing bones for corsets.
Cleaning tips: Dry Cleaning recommended
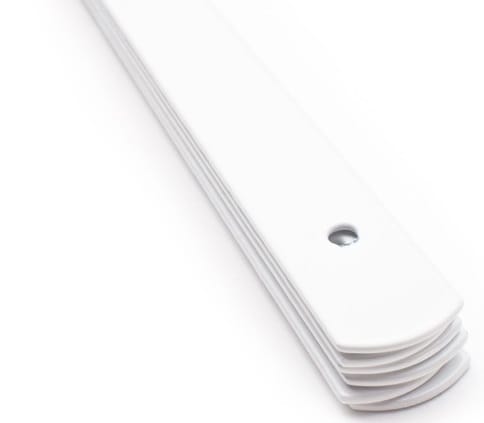
8. Extra Wide Bones:
A rigid bone made of nylon coated spring steel. Specs 1″ wide. Very little flex, one direction only.
Advantages: A strong, rigid boning.
Disadvantages: Cannot be sewn in curved channels.
Uses: Busk reinforcement. Heavy support. Costuming.
Cleaning tips: Dry Cleaning recommended
9. Natural Corset Boning:
In the earlier period whale bones were used inside petticoats and corsets.
Whalebone (Baleen):
Corsets from the 18th century, Victorian era and Edwardian era were usually stiffened with whalebone. Whalebone was flexible, stiff and lightweight and could be shaped with heat and moisture.
Baleen is a filter-feeding system inside the mouths of whales.
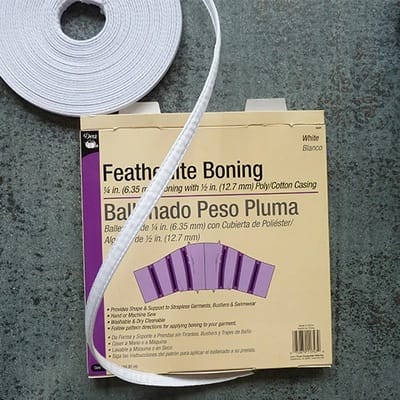
Featherbone:
Featherbone was made from the quills of feathers and it was more pliable than whalebone. Therefore it was used less for corsets and more for dress bodices, belts and as collar supports.
Featherbone was a substitute for whalebone in the Edwardian era.
Horn:
Horn was another substitute for whalebone. It could be shaped with heat and moisture. If only horn, that is long enough as corset boning, wasn’t so expensive!
Tips and Notes for Boning:
- You don’t want to skip boning if your dress is strapless, especially if the pattern calls for boning. It’s necessary to support the bodice and keep the dress from falling down.
- You can buy metal boning by the yard or meter or in precut lengths. If you need to shorten metal boning.
- You’ll need wire cutters. End caps cover the cut ends and are applied with pliers.
- U-shaped tips that cover the cut ends of continuous boning. They come in ½” or ¼” to match your the size of your boning.
How to Sew Boning into a Bodice or Dresses:
In this example, I’m using the type of boning that comes in the fabric casing. I am applying the boning to the lining of the bodice, so the casing seams are visible only inside the garment, not from the outside.
First, you’ll construct the bodice lining. Sew all princess seams or darts, and sew side seams of bodice front and back. Leave the bodice open at the closure seam. In this case, the closure is a left side zipper. Press darts and press seam allowances open. Trim seam allowances to ¼” (6mm). Trimming is optional, but it helps to reduce bulk, if necessary.
If the pattern calls for boning, it will indicate which seams require boning. If not, decide where you want to add the boning. At minimum, you’ll want to add a piece of boning to each side seam. Those two pieces will add structure and help keep your dress up. Depending on the design, you may want to add boning to the vertical seams as well, along the vertical darts at the back or along center front or back. The more boning you add, the more structured your bodice will be.
Figure 13, Measure the seams where you want to add the boning, and cut the boning to match the seam lines. You’ll need one piece of boning in its casing for each seam.

Figure 14, Take the boning out of its casings. You’ll have curly plastic strips. To straighten out the boning pieces, fill a shallow dish with boiling water and drop the plastic pieces into the water. Leave the boning in the hot water for five to ten minutes, using a mug or dish to hold the pieces under water. Take the pieces out and press them flat under something heavy while they cool off. (If you’re not able to soften the boning in hot water, alternate the direction of the curl as you insert each piece into its casing so that they don’t curve the same way. Over time they should straighten out.)
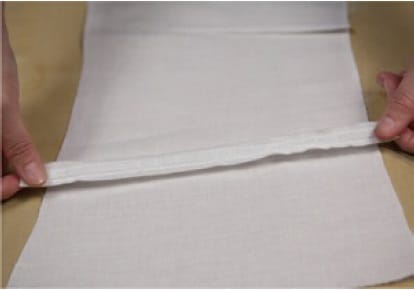
Figure 15, Center the casings along the seam lines or dart lines, and pin to the bodice. Pin all of the casings in place. Edgestitch on either side of the casing, through the original casing stitch lines, with your sewing machine.
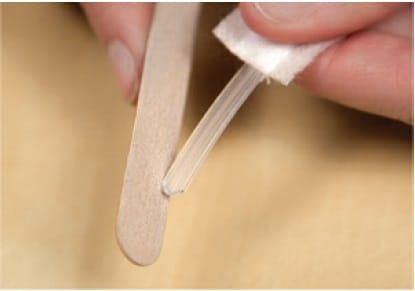
Figure 16, Before inserting the boning back into the casing, trim ¾” (1.9cm) off each end. You do this is to make sure you don’t stitch through the boning when you sew your top and bottom seam allowances. Cut the ends in a slight curve to remove the corners. With a nail file, file the ends into a slight arc to smooth out any sharp points. Alternately you can melt the ends carefully with a match or lighter. The ends will form a hard knob without any sharp edges.
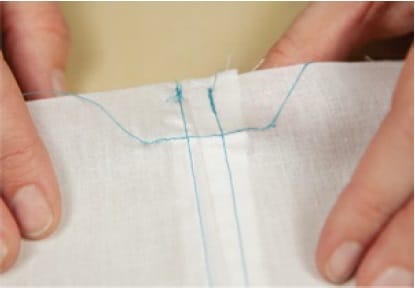
Figure 17, Insert the boning into the casings, and check to make sure each piece ends at least 5⁄8″ (1.5cm) from the raw edge. Sew across each of the casing openings to keep the boning inside its casing.
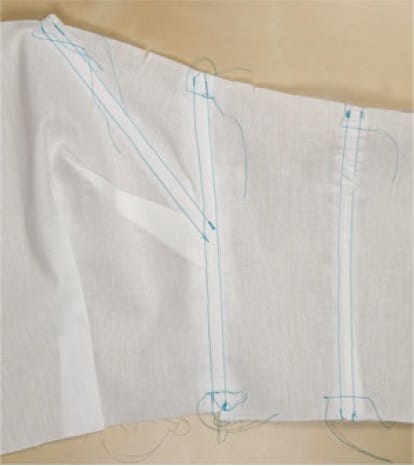
Your boned bodice is complete.
How to Sew the Sew-Through Type of Boning:
If you are using the sew-through type of boning, follow the same steps as above, cutting the boning pieces shorter than each seam by ¾” (1.9cm) on each end. Instead of sewing the fabric casings to the bodice, center the boning over the seam line, and edge stitch along both edges right through the boning.
Side Boning:
There are times when you will want to add additional support to the band of the bra. One option for doing so is to add boning to the side seams. This technique is only recommended for bras that are designed with a side seam.
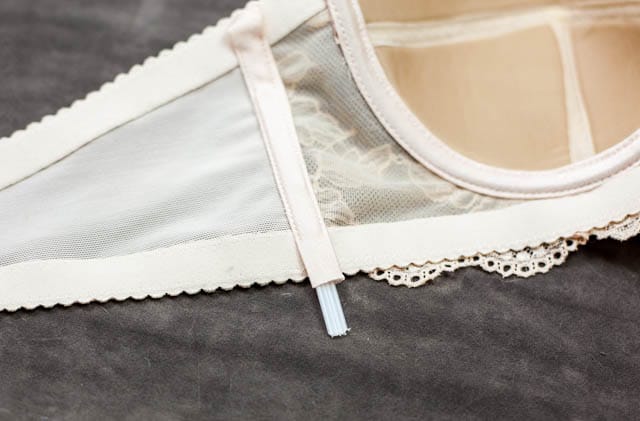
This application of side boning differs from the underwire casing application in that it is not stretched as it is applied and neither end is concealed under the elastics of the bra. The omission of concealment allows the boning to span a greater distance and provides for a smooth and balanced appearance at the underarm.
Uses of Boning:
- Boning helps a garment maintain its shape and stay wrinkle-free.
- Boning is long, flat and stiff and is inserted inside the garment to give it stiffness and structure.
- Use boning to stand up a collar, keep folds or pleats in place, and keep necklines from sagging.
- It is used in wedding dresses, evening wear, bustier, swimsuit or strapless gown , bras, corsets, petticoats, hats, toys swimwear, bags and purses.
- Boning is frequently seen in strapless dresses, halter tops, structured bodices, corsets, foundation garments and other tight-fitting garments.
- Boning helps smooth out the lines of a bodice. It holds the seams straight and keeps them from wrinkling.
- Boning is sewn along straight, vertical seams, including side seams, princess seams and center seams. Boning can be sewn on either side of a zipper for extra support.
- Sometimes you will even see boning sewn on an angle to help support the lines of the garment. You won’t be able to see the boning from the right side of the garment, but you may see the top stitching lines of each casing.
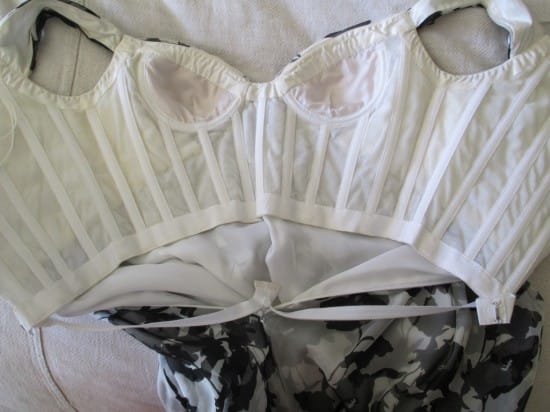
- Sometimes the casings are sewn to the outside as a design feature, as seen in corsets or foundation garments.
Using Boning in Everyday Clothing:
- Add boning to the top of a wide neckline to keep it from draping.
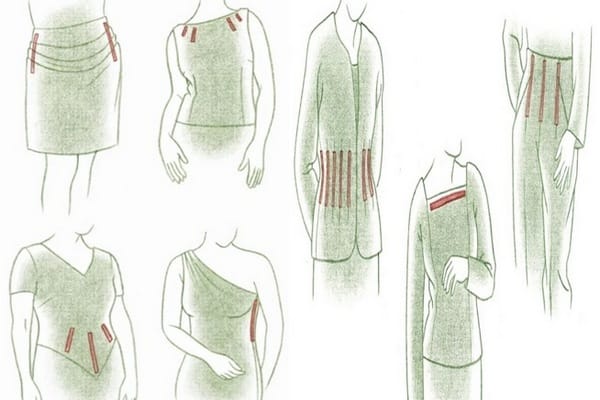
- Plastic or featherlite boning can be used for more than just shaping clothing. It can be sewn in any direction needed to keep your garment in place. Here are some ways you can use boning to make your everyday clothes more comfortable and fit better.
- Sew it horizontally into the dart of a bustline to keep it in place.
- Sew it along the hips of a tight pencil skirt to keep it from riding up. It will prevent the fabric from folding and wrinkling as you move.
- Sew a few pieces of boning into a high waistband to keep it from riding up or wrinkling.
References:
- The Sewtionary: An A to Z Guide to 101 Sewing Techniques and Definitions by Tasia St. Germaine
- Knitting Lingerie Style: More Than 30 Basic and Lingerie – Inspired Designs PDF by Joan McGowen-Michael
- Demystifying Bra Fitting and Construction PDF by Norma Loehr

Editor of Fashion2Apparel. She is a fashion designer and ex-lecturer in Fashion Designing. She wants to spread fashion knowledge throughout the world.


Very very good explanation and I learn a lot
I have learnt a lot from this explanation