Last Updated on June 20, 2026
What is T-shirt?
A t-shirt or tee is a short-sleeved casual top, generally made of cotton, having the shape of a T when spread out flat. To produce high quality garment in apparel manufacturing industry, a perfect machine layout plan must be required. Before starting the manufacturing of t-shirt, production manager prepare a machine layout plan for quick output. Round neck t-shirt stitching process is divided into 4 sections.
These are in below:
- Front side
- Back side
- Sleeves
- Neck joint
Step by Step T-shirt Manufacturing Process:
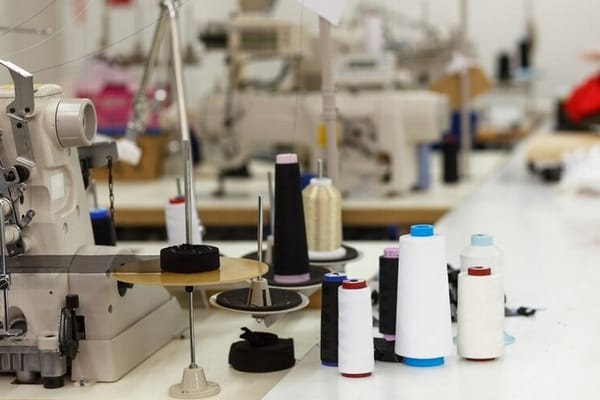
To assemble the t-shirt, different types of industrial sewing machines are arranged by following the layout plan. Line balancing of sewing machines are mainly depends on the process of t-shirt manufacturing. However, the t-shirt manufacturing process can be changed according to the style of garment.
Here I have mentioned the sewing sequence of t-shirt production:
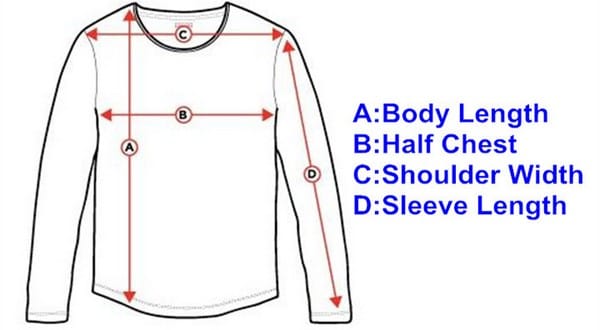
Matching the number and size with back and front part
↓
Join the shoulder
↓
Attached Interlining
↓
Over lock the lining
↓
Ready the neck rib for collar
↓
Join the neck rib piping edge by plain machine
↓
Neck joint
↓
Over locking the neck
↓
Neck tape join and also attached the size label
↓
Neck rib top stitch
↓
Attached the main label
↓
Sleeve marking and numbering with body parts
↓
Sleeve hem
↓
Sleeve joint with the body part
↓
Attached arm side hem
↓
Side seam and at this moment join the care label
↓
Sleeve tuck
↓
Bottom hem tuck at the end
↓
Bottom hem
↓
Inspection
Line Balancing or Machine Layout Plan of T-Shirt Manufacturing Process:
Here you will find out the machine layout plan for t-shirt for 180 pieces per hour. Types of machines that are mostly used in t-shirt manufacturing, but this line balancing should be changed when the t-shirt style are different.
| Sl. No | Types of operation | Types of machine | Machine quantity |
| 01 | Join the shoulder | Over lock machine | 1 pc |
| 02 | Over lock the lining | Over lock machine | 1 pc |
| 03 | Join the neck rib piping edge by plain machine | Plain machine | 1 pc |
| 04 | Neck joint | Over lock machine | 1 pc |
| 05 | Over locking the neck | Over lock machine | 1 pc |
| 06 | Neck tape join also attached the size label | Plain machine | 1 pc |
| 07 | Neck rib top stitch and Attached the main label | Plain machine | 1 pc |
| 08 | Sleeve hem | Flat lock machine | 1 pc |
| 09 | Sleeve joint with the body part | Over lock machine | 2 pc |
| 10 | Side seam | Over lock machine | 3 pc |
| 11 | Sleeve tuck | Plain machine | 1 pc |
| 12 | Neck top stitch | Flat lock machine | 1 pc |
| 13 | Bottom hem tuck at the end | Plain machine | 1 pc |
| 14 | Bottom hem | Flat lock machine | 1 pc |
The Life Cycle of a T-Shirt Manufacturing:
- Raw Materials – fertilizer, energy, water;
- Processing – energy, cleaners, dyes;
- Manufacturing – energy, waste;
- Packaging – paper, plastics, waste;
- Transport – energy;
- Use – bleach, detergents, water, energy;
- Either one of – disposal (landfill) or reuse (go back to 6), or recycle (go back to 1).
A lifecycle approach helps us to engage in whole systems thinking –both understanding the complex interactions between energy and material throughout the life of a product, and thinking in the long term about the impact these interactions will have on the environment and society.
You may also like: Step by Step Polo Shirt Measurement Guide with Size Chart

Editor of Fashion2Apparel. She is a fashion designer and ex-lecturer in Fashion Designing. She wants to spread fashion knowledge throughout the world.


Thanks for the information you provided in your blog. Keep doing, Nice Work.